파이썬과 DDD로 라이프 캘린더 만들기 #10 조회 기능과 DTO
시리즈 전체 목록 (계속 업데이트 중)
이번 글에서는 다음 요구사항,
- 캘린더를 상세 조회하면 생년월일부터 수명에 따른 죽음까지의 주 매트릭스(가로 52주 X 세로 수명)를 보여준다.
- 주 매트릭스에서는 과거(past) 주, 이번(now) 주, 미래(future) 주를 각각 다른 색으로 표시한다.
을 구현해 보겠습니다. 이를 '캘린더 상세 조회 기능'이라고 이름 붙이겠습니다.
주 마다 시간 타입 구분
주 마다 과거, 현재, 미래를 표시하기 위해서 Week 모델에 time_type 속성을 구현해 줍시다. 내용이 복잡하고 길기 때문에 여기서는 마지막 반환 코드만 보고 전체 코드는 이 커밋을 참고해주세요.
class Week:
	...

    @property
    def time_type(self) -> TimeType:
		...

        match (before_born, after_death, past, now, future):
            case (True, False, True, False, False):
                return "before_born"
            case (False, True, False, False, True):
                return "after_death"
            case (False, False, True, False, False):
                return "past"
            case (False, False, False, True, False):
                return "now"
            case (False, False, False, False, True):
                return "future"
            case _:
                raise ValueError(
                    f"invalid time type: {before_born} {after_death} {past} {now} {future}"
                )
응답 DTO 작성
그리고 데이터베이스로부터 캘린더 엔티티를 조회하겠습니다.
# src/appl/get_calendar.py

class GetCalendar:
    def __init__(self, db_context: IDBContext, calendar_repo: ICalendarRepo) -> None:
        self.db_context = db_context
        self.calendar_repo = calendar_repo

    def run(self, calendar_id: uuid.UUID) -> Calendar:
        with self.db_context.begin_tx():
	        cal = self.calendar_repo.get_or_error(calendar_id)
    	    return cal
그러나 '캘린더 상세 조회 기능'에서 캘린더 모델을 바로 반환해도 괜찮을까요? 평범한 상황이라면 큰 문제가 없을 수도 있습니다. 하지만 응용 계층과 트랜잭션 바깥에서 ORM 모델의 속성에 함부로 접근했다가 lazy loading 등(SQLAlchemy의 경우 relationship)을 수행할 경우 문제(DetachedInstanceError)가 생길 수 있습니다. 물론 eager loading을 사용하면 되지만, 어디서 어떤 속성이 필요할지 모르는데 레파지토리 조회 코드에 eager loading 옵션을 박아두기는 조금 찜찜한 마음이 듭니다.
또 조회 기능의 응답 형식이 언제나 하나의 도메인 모델 혹은 모델의 목록만은 아닙니다. 상황에 따라 여러개의 모델을 조합하거나, 모델을 가공한 새로운 데이터 형태를 전달해야 할 수도 있습니다. 그렇기 때문에 조회 기능의 응답 형식으로 도메인 모델을 바로 사용하기 보다 새로운 응답 형식을 선언하는 것이 유지보수에 유리할 것입니다. 이 응답 형식을 DTO라고 하고, 이를 위한 코드를 다음과 같이 작성해봅시다.
# src/appl/dto.py

from typing import Self

from pydantic import BaseModel, ConfigDict


class Resp(BaseModel):
    model_config = ConfigDict(from_attributes=True)

    @classmethod
    def create(cls, obj) -> Self:
        return cls.model_validate(obj)
Pydantic을 이용해서 응답 DTO를 작성합니다. from_attributes와 model_validate를 사용하면 일반 파이썬 객체를 Pydantic 모델로 변환할 수 있습니다. 일단 여기서 커밋합시다!
이 Resp 타입을 사용해서 '캘린더 상세 조회 기능'의 응답을 작성해 봅시다. 도메인 모델에 대응하는 모든 응답 타입을 선언해줍니다.
# src/appl/get_calendar.py

from src.appl.dto import Resp


class WeekResp(Resp):
    yearnum: int
    weeknum: int
    today: datetime.date
    birthday: datetime.date
    lifespan: int

    time_type: TimeType


class YearResp(Resp):
    yearnum: int
    weeks: list[WeekResp]


class CalendarResp(Resp):
    id: uuid.UUID
    name: str
    birthday: datetime.date
    lifespan: int

    years: list[YearResp]


class GetCalendarResp(Resp):
    calendar: CalendarResp
이제 응용 계층에서 선언한 응답 DTO를 반환해 줍시다.
# src/appl/get_calendar.py

class GetCalendar:
    def __init__(self, db_context: IDBContext, calendar_repo: ICalendarRepo) -> None:
        self.db_context = db_context
        self.calendar_repo = calendar_repo

    def run(self, calendar_id: uuid.UUID) -> GetCalendarResp:
        with self.db_context.begin_tx():
            cal = self.calendar_repo.get_or_error(calendar_id)
            return GetCalendarResp(calendar=CalendarResp.create(cal))
이 기능 객체를 컨테이너에도 등록하고 커밋해줍시다! 이 기능에는 테스트 코드가 없는데, 지금 이 조회 기능을 테스트하는 것은 SQLAlchemy를 테스트하는 것과 같기 때문에 필요 없다고 판단했습니다.
이제 구현한 기능을 HTTP로 공개해 줍시다. 기존과 같은 방식으로 FastAPI 코드를 작성하면 됩니다.
@api_router_calendar.get("/{calendar_id}", response_model=GetCalendarResp)
async def get(calendar_id: uuid.UUID):
    return container.resolve(GetCalendar).run(calendar_id)
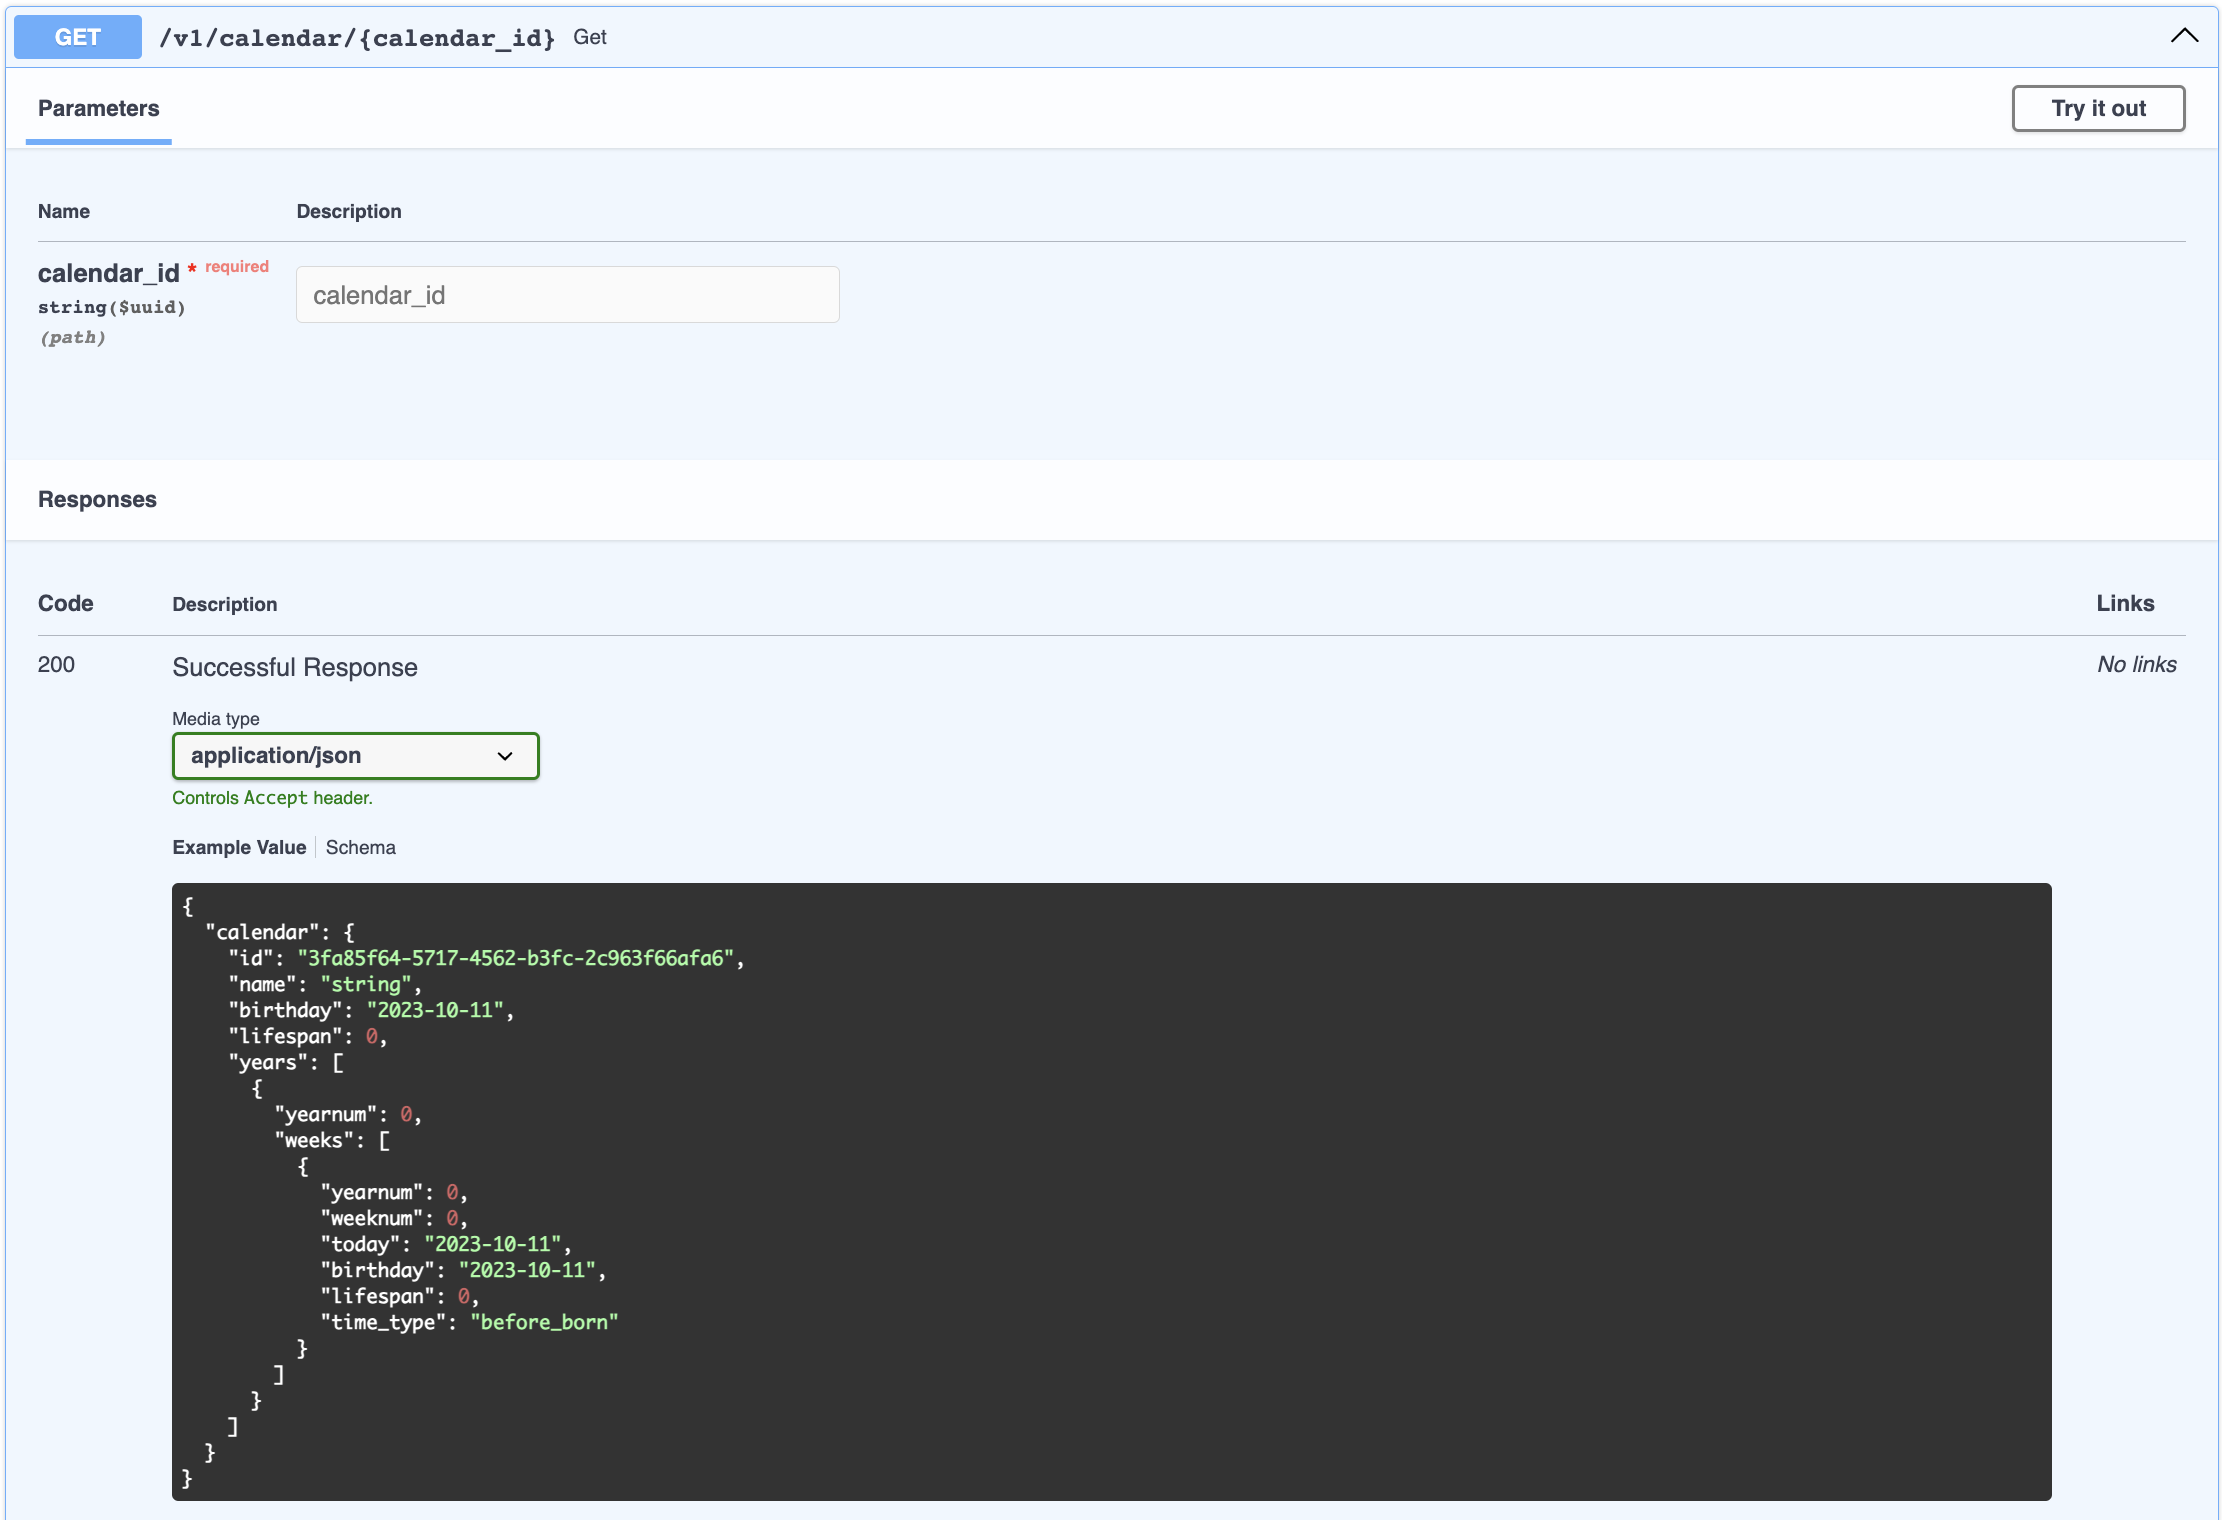
단 하나 다른 점은 response_model 속성에 앞에서 작성했던 응답 형식을 넣어주고 있다는 점입니다. FastAPI는 Pydantic 모델을 받으면 스웨거 문서에 형식을 표시해줍니다. localhost:8000/api/docs로 접속하면 다음과 같이 응답 형식의 JSON 버전을 확인할 수 있습니다. 여기서 커밋하겠습니다!
이렇게 '캘린더 상세 조회 기능'을 완성했습니다. 이것으로 처음에 기획했던 모든 요구사항을 전부 구현했네요! 다음 글에서는 이 파이썬 서버 API를 사용하는 화면을 실제로 구현해서 서버와 함께 배포해 보겠습니다. 서버 배포와 화면을 구현하는 작업은 이 시리즈의 핵심 내용은 아니므로 아주 짧은 글이 될 것 같네요.
Member discussion